
Nathan got a couple of Hexbugs for his birthday with a starter maze - and he loves them! So, naturally, he started asking for more Hexbug stuff for Christmas! Now, if you look at Walmart you'll see that a large maze set runs about $30 or more!
Well, the last time we were at Cousin B's house, he showed Nathan his homemade Hexbug maze and Nathan came home 'begging' for one. I'm not joking...every day he would ask "So, when can we make my Hexbug maze?"
Finally, I sat down with him and we did it! So here is our step by step guide. Materials needed:
Large box to hold maze
duct tape - can be colored -- we only had plain old gray
Scissors
Popsicle Sticks
And a large marble (according to B and Nathan ;0)
So, first, we took the box and drew the lines out for how we wanted the maze to look:
 |
| Our box had holes in the bottom, so we duct taped them twice to provide a flat surface. We also taped the ends and sides where there were holes. |
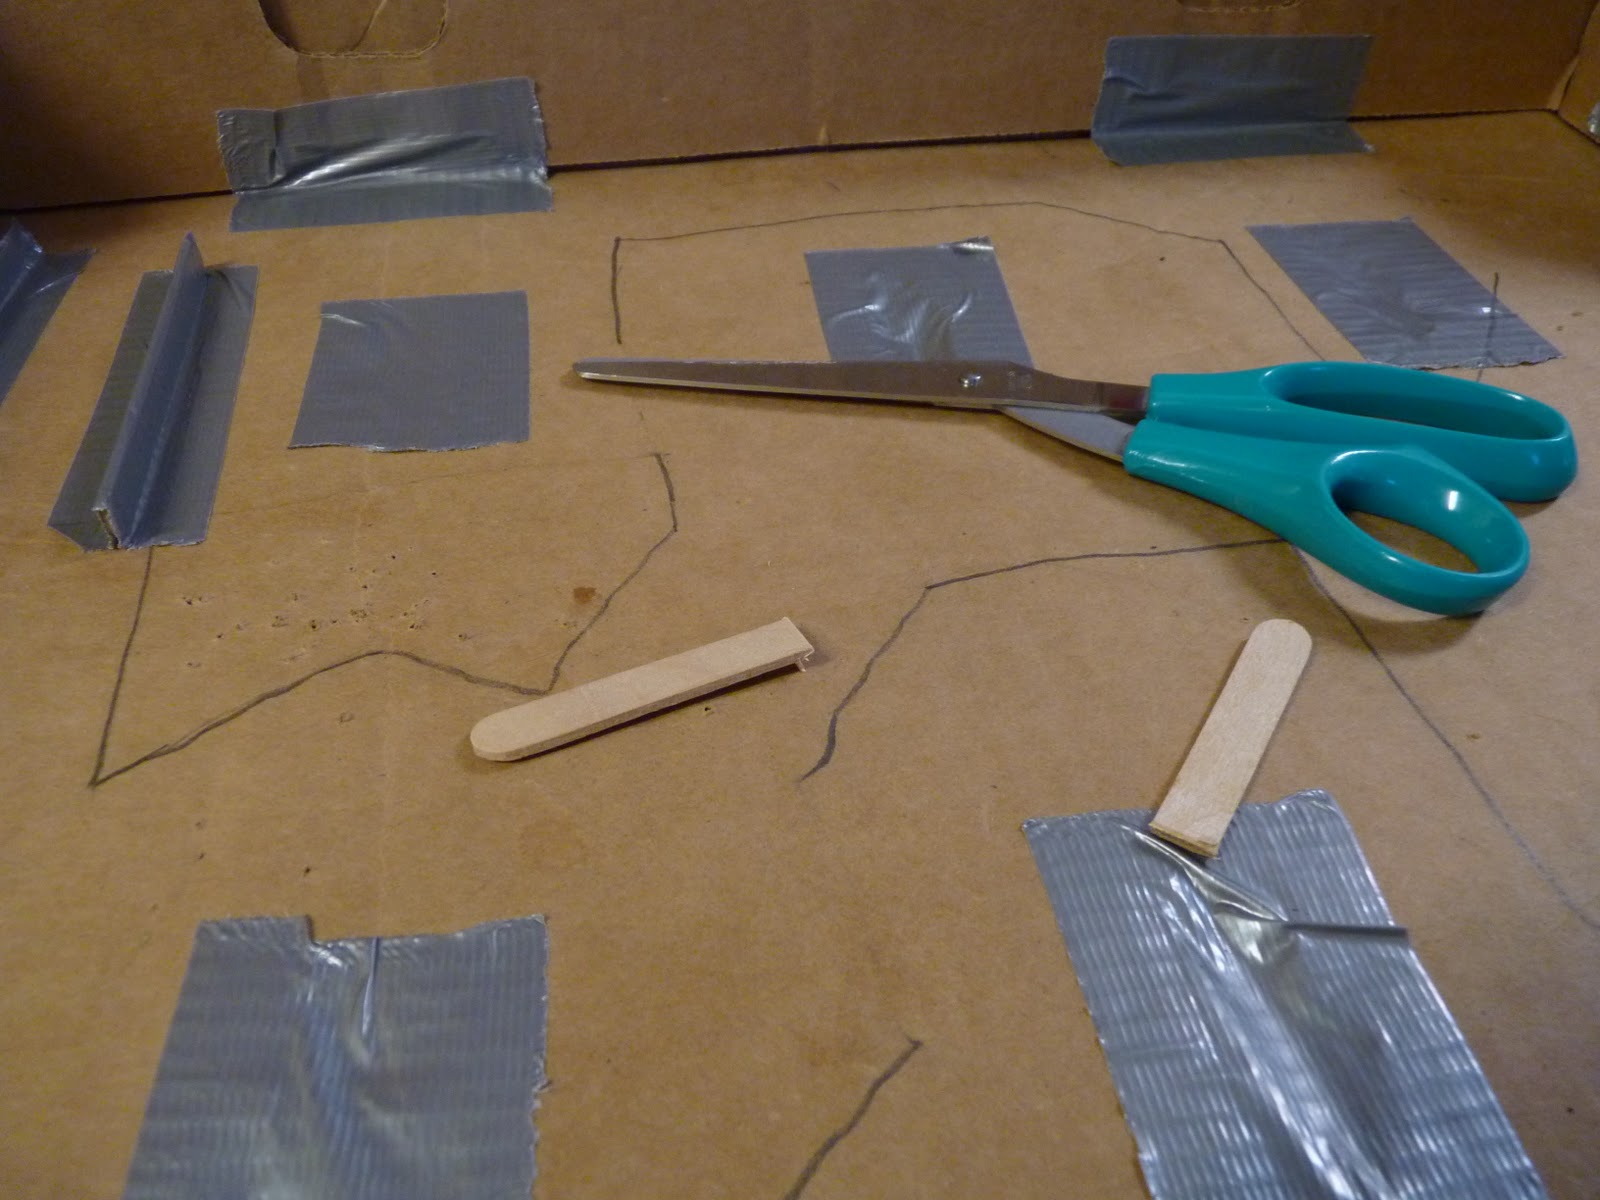 |
| A closer look of our Mapping. |
 |
| Stick and Tape about the same length. |
 |
| Press the stick in the center on one side. |
 |
| Fold the tap back so that it doesn't stick to the other side. |
 |
| Then press other side down and fold back that side too. |
 |
| You can see how it stands on its own but the edges have not been anchored yet. |
 |
| Now securely press down all edges. Make sure there are no edges or the Hexbugs will get stuck. |
 |
| You can see how the end of this corner has been reinforced. |
 |
| Our Finished Product! |
 |
| HexBug actively enjoying the MAZE! |
 |
| Another picture of the Hexbug in the maze. |
Copyright © 2011 All Rights Reserved MMFarmlife - Melanie Schlatter